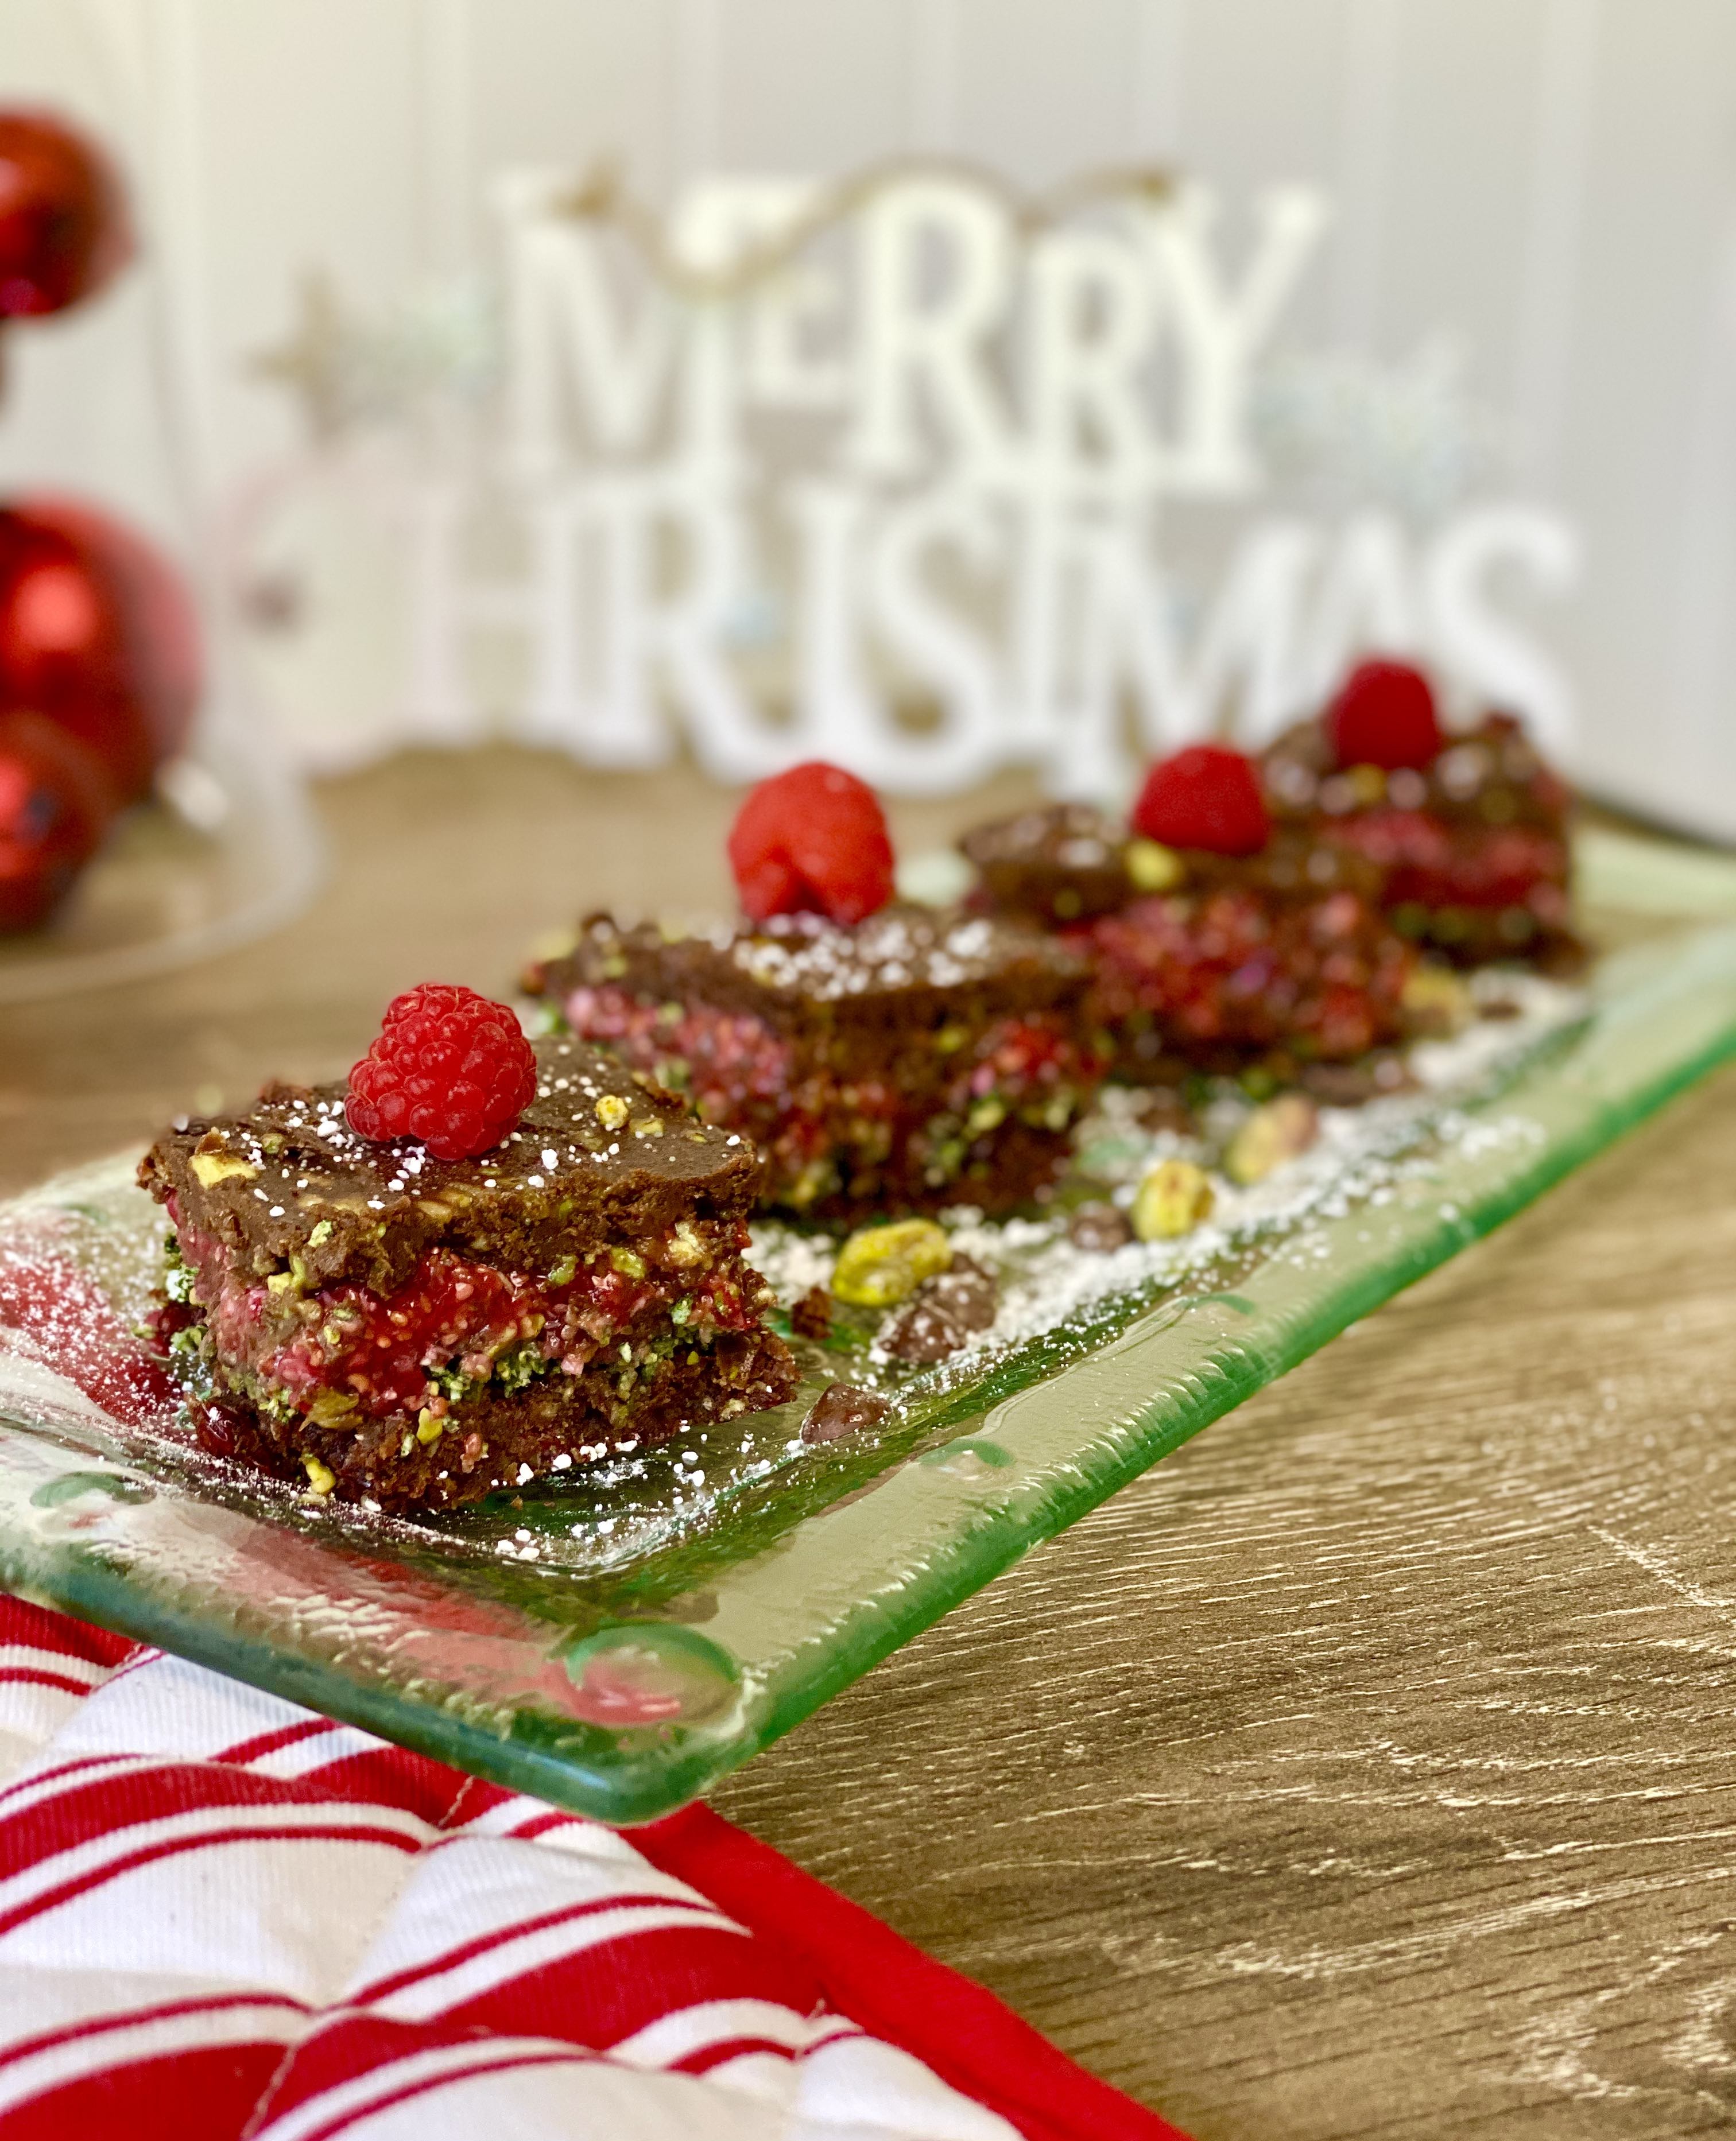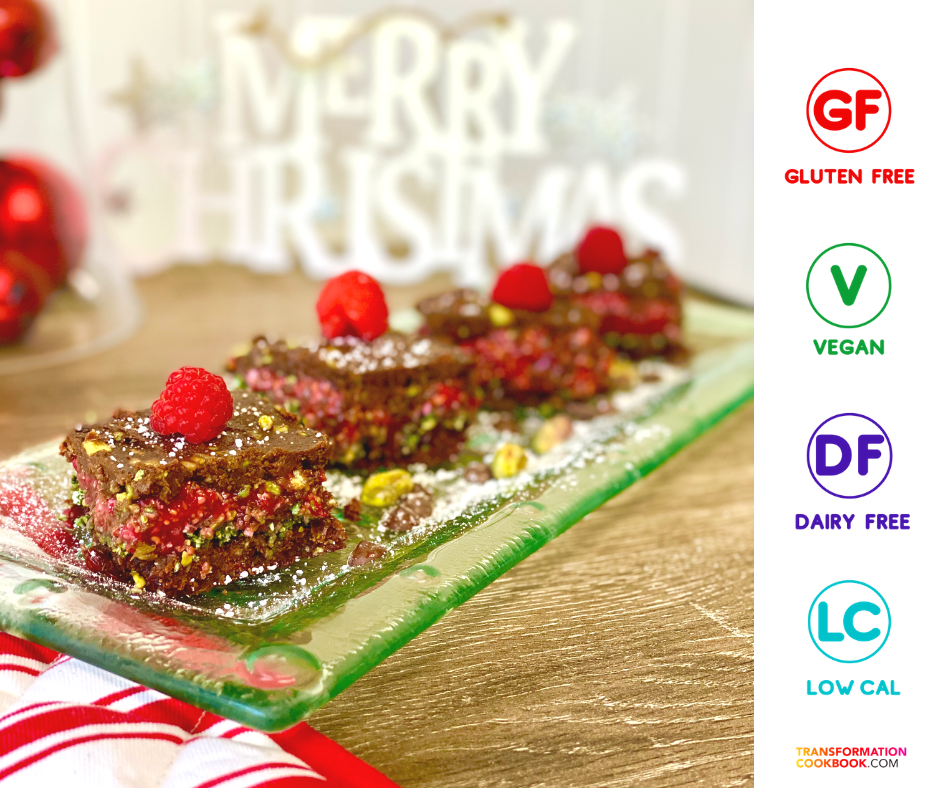
Prep & Cooking Time: 30 minutes
Serves: 16 slices / squares
Nutrition Info: (per slice)
Less than 100 Cals kJ’s: 419.5 Protein: 2.3g Carbs: 9.4g Fat 5.9g
What You Need:
¼ cup dried cranberries
2/3 cup almond meal
¼ cup desiccated coconut
8 large dried pitted dates
½ tsp vanilla extract
2 tbls tbls cacao powder
1 tbl flaxseed meal
2 tbls ‘sugar free’ maple syrup
2 tbls lite nuttelex, melted*
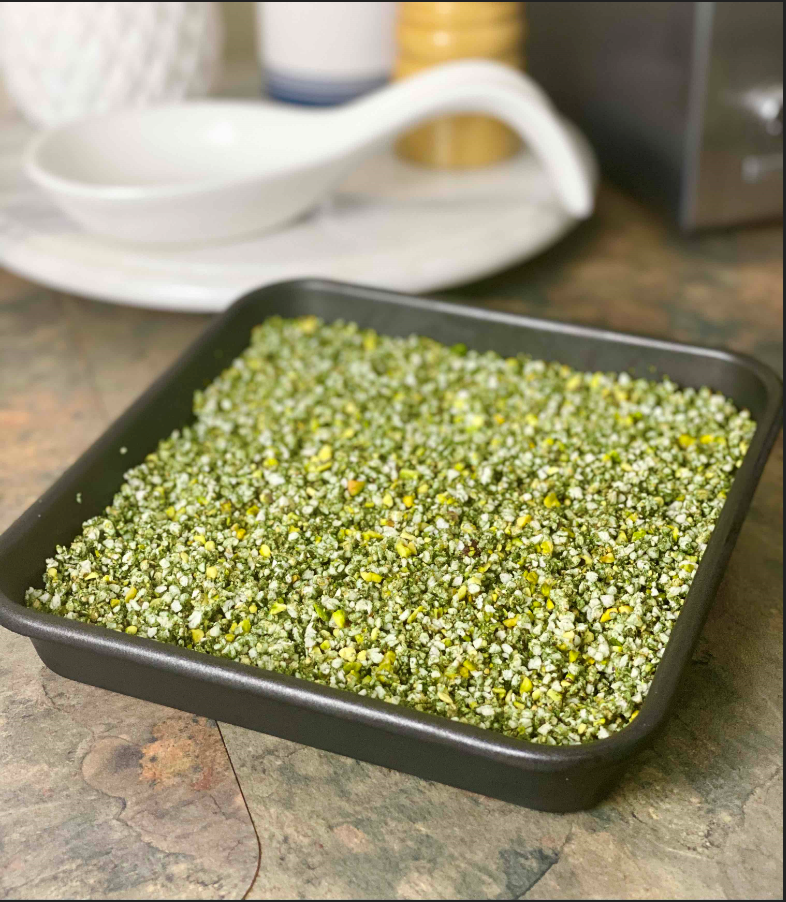
For the Pistachio layer:
2 tbls pistachios
1½ cups ‘Abundance Earth’ gluten-free puffed rice (can use normal rice bubbles for non-vegan)
½ tsp of spirulina
2 tbls ‘sugar free’ maple syrup
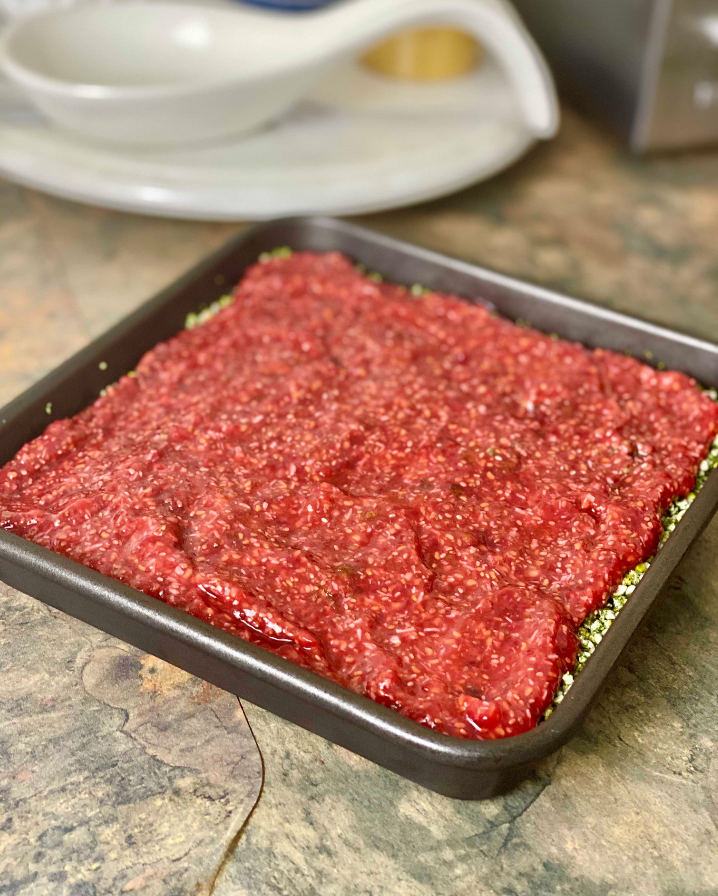
For the Raspberry layer:
2 cups / punnets of fresh raspberries (can use frozen but allow to thaw and drain excess juice well.)
2 tbls chia seed (black)
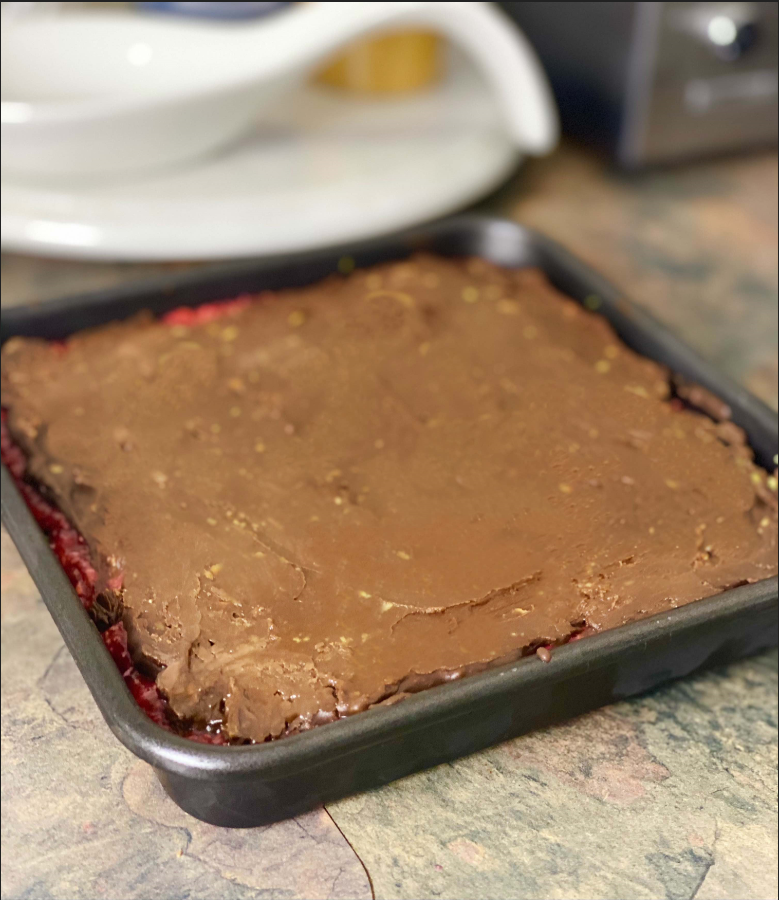
For the Chocolate topping:
1 tsp lite nuttelex
60g of Noshu – sugar free, dairy free chocolate nibs
1 tbls sugar free maple syrup
What To Do:
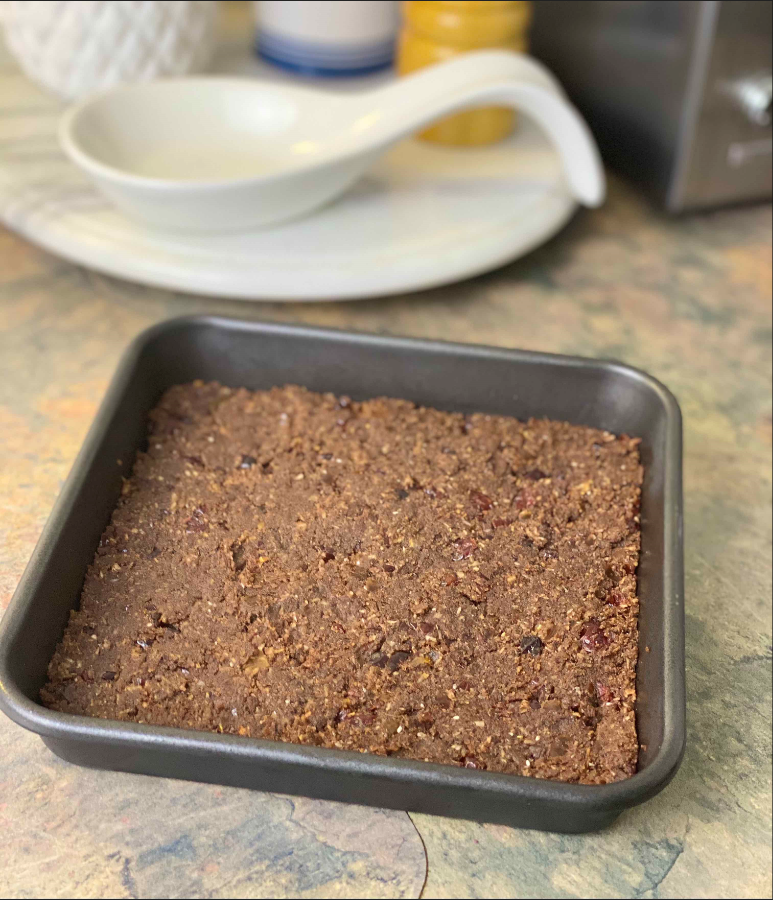
1. Line a 20 x 20cm brownie tin with a sheet of baking / parchment paper.
2. To make the base, place all ingredients except butter* into a food processor / bullet and blend until combined. Pour in melted butter and pulse blend 1-2 times until the mixture comes together to form a slightly moist, sticky paste consistency.
6. When done, spread the raspberry chia mixture over the pistachio layer and return to freezer.
8. When melted, stir in butter. Pour chocolate topping over the top of the slice. A little helpful hint – I suggest you score the layer of chocolate (when set slightly) to allow for ease of cutting the slice once set. Otherwise you will end up with shards of chocolate everywhere when trying to cut it later on.
Serving suggestion:
Serve as small bite sized pieces or sliced into bars.
Shar’s Tips:
Cut the slice before the chocolate fully sets to avoid any cracks. A warm knife helps too. Run it under hot water and dry before slicing. Clean or wipe between slices.
Keep this slice in the freezer until you are ready to serve as it will melt quickly on a hot day. Store slices in the freezer in an air-tight BPA-free container up to 1-2 months.
Cacao Powder can be substituted with regular cocoa powder in the same amount.
Get lots more recipes like this in my NEW Transformation Cookbook